White Enchiladas


I found this recipe (from my new favorite site!) and couldn't resist.  But in an effort to NOT give Miyagi a heart attack I fudged a few things to make them slightly (only slightly) less death-inducing.  I'd take a good look at that recipe though.  My descriptions are somewhat lacking in, oh, measurements and such.

First I started by cooking some chicken for shredding.  The recipe uses a whole chicken but I'm too lazy to deal with that so I just used a couple of chicken breasts.  This is my attempt at shredded chicken.  This picture was also taken before I got frustrated with forks and just stuck my fingers in the chicken the pull apart as many little pieces as I could!  Darn chicken.


And this is the can of chicken that I prematurely opened thinking I'd need to sneak behind Miyagi's back and supplement my chicken . . .but I didn't end up needing it!  Hooray!  But I'd already opened it so now I have an open can of chicken in my fridge. Boooo!


Then I sauteed up some chopped onion.  But I didn't have quite enough so I chopped them really small.  It makes sense in a weird way.  Basically you are making two parts in this recipe.  This is the filling, and later you make the sauce.  Or if you're a superhero you can make them at the same time.  I am not a superhero (or am I?) so we're starting with the filling.  After the onions cook slightly you can add in your chicken, and some chilies.  One of my $0.25 cans of chilies with the festive labels was perfect for this.

Add some paprika and chicken stock to keep things moving around, and get everything nicely mixed up.  Now at this point the recipe called for heavy cream.  But I didn't even have LIGHT cream.  Or beige.  So I poured in a little milk and a dollop of sour cream.  In my opinion there can never be too much sour cream in a recipe.  This worked just fine.  After all the liquid cooks off you can let this cool a bit while you get your tortillas ready.

A lot of people use flour tortillas in a recipe like this, but we had a bunch of corn tortillas and they sounded good so pulled them out.  Normally you're supposed to lightly fry them in some oil to soften them up but 1. I'm too lazy and 2. this recipe doesn't need any more oil.  So I nuked them for a few seconds to warm them up so that they were pliable AND they burned my fingers at the same time!  I'm so good.  Anyway.

Put in a little of the chicken mixture.


And then a little Monterrey Jack cheese.  This is holy cheese.  That's why it's glowing.


Then you can roll them up and set them seam down in a 9x13 pan.  People seem to love Pyrex for these but this is the only 9x13 we have so you'll just have to deal with it.  As you can see mine are perfectly rolled and sealed with no tearing or breaking at all.  You can see that right?  RIGHT?? 


Now to the sauce.  Melt a few table spoons of butter in a skillet and whisk in a few tablespoons of flour until it looks like this.


Then add about 1 1/2 C of chicken stock and whisk until it's smooth.  Stir in another cute little can of chilies and about a cup of sour cream.  Once this is well mixed dump in 1-2C shredded Monterrey Jack and stir it until it's all melted and happy.  Give it a good dose of salt and pepper and a dash of paprika and you're all set!  But we're not done.


Pour this concoction all over your pan of enchiladas.  And then because you want to use the rest of your cheese (and NOT because you want to hide the jagged broken pieces of tortilla sticking out of the sauce) sprinkle the rest of the cheese over top. Hey this corner looks ok. 


 Stick this in the oven at 350° for about 30 min until that corner now looks like this.  Spend that 30 min liking out the bottom of the sauce pan like you would if you were making brownies.  This could be considered a meal on it's own if you're in a rush.

And voila!  It only took you 2 hours to make a beautiful (at least one corner) pan of enchiladas!  Of course, we couldn't wait 2 hours for dinner.  So we started with an appetizer of pizza rolls, and then ate dinner around 9:30pm.  If I were smart I'd make up a bunch of the chicken filling and just freeze it for quick enchilada making later.  But I'm not always that smart.

Egg Rolls i.e. Packets of Happiness

For those of you who have never contemplated the joy of homemade egg rolls it's time to man up and contemplate it.  You my think of egg rolls as a nice side or appetizer.  But you would be wrong.  These are the main dish baby.  They are just that good.  Plus once you've succumbed to the egg roll induced trance and devoured 8 or 9 of them you won't have room for anything else anyway.  This is pretty much EXACTLY the recipe on the back of the egg roll wrappers, but we found that using sausage instead of hamburger makes a huge difference and we were just looking for places to pack in the calories.

Start with this:

Contents include:
  • 1 pkg egg roll wrappers (they're not THAT homemade)
  • 1 bag coleslaw mix
  • 1 bag (several handfuls) bean sprouts
  • 1 lb reduced fat ground sausage
  • 2-3 tsp ground/minced ginger (here is looks like mandrake root)
  • 3 green onions, chopped
And possibly the most important ingredient that I forgot to picture is. . .  oyster sauce.  Now I know what you're thinking.  I was an unbeliever like you once.  "Oysters?  Gross!  Oyster SAUCE?  Uber-gross!"  Even people who like oysters still think this.  But they are wrong.  And so are you.  Oyster sauce is the wonderful, magical sauce that turns all Asian recipes into happiness.  You think that soy sauce is the key, but that just tastes salty and weird when cooked.  So once again you're wrong.  You're wrong a lot today, did you notice?

Ok.  First cook up the sausage and ginger in a large skillet.  Trust me when I say large because it gets full later on.  If your skillet isn't big enough to handle all the cabbage/bean sprouts to come you might need to add them in batches.  When your sausage is about half done browning throw in the chopped green onions thusly.

(I apologize I should have waiting to take a picture until the sausage was ALL THE WAY done.  This looks a little gross and a lot unappetizing.)

When this is all done drain out the extra fat, (with the reduced fat stuff there's not anything to drain), and turn off the heat.  Then add in the whole bag of cabbage, and the whole bag of bean sprouts.  Then top it off with 3-4 generous Tbs of oyster sauce.  (I know it looks like octopus ink in this picture but it's really quite tasty.  It doesn't taste like oysters at all.)

Mix it all up good and let it rest and cool a bit while you set up your wrapping workspace.

You will need some space to roll up the egg rolls, somewhere to stack them, and a small cup of water.  If you have someone helping you this is probably a good time to start heating up your frying oil as well.  If you're flying solo don't try to do it all at once.  Just roll them all, then you can focus on frying without fear of 2nd degree burns.  Again, these rolling instructions are on the back of the egg roll package but here's some pictures to help you visualize.

Start with one egg roll wrapper laid at an angle (like a diamond) and spoon about 3Tbs of your egg roll mixture in the middle.  NOTE: I was taking these pictures at an angle while Miyagi rolled them up so the viewpoint is a little skewed.  Imagine you're standing slightly to the left of this and you'll get the gist.


Next fold up the bottom corner and tuck it in a little to make a nice little log shape.


Then fold in the sides like a burrito.


Then dab your finger in the water, swipe it over the top corner, and roll it all the way up to seal it.


Sometimes the bottoms get a little moist so if you're having trouble with the wrappers tearing when you pick up the egg roll try keeping them on parchment paper and handle them gently to avoid this.  Once you have a few done you can start frying, are cool like me (and a little white trash) then you have your own Fry Daddy and frying is fast and clean!  However if not you can heat up some vegetable oil in a large pot.  You only need about 2-3in of oil but a larger pot keeps the oil from spitting out everywhere.  Dump these in 350° oil and let them cook for about 3-4 minutes until they golden brown like this.


Then spoon them out and put them on some paper towel to cool.  Tongs are really good for this step.  If your egg rolls are greasy it means that your oil isn't hot enough.  They should look dry within about 30 seconds of removing them from the oil.

My biggest trouble is that I can't turn them over in the fryer without them flipping right back up.  Generally I take the frying spoon and balance it on the edge in such a way that it completely submerges the egg rolls in the oil.  This is dangerous and impractical and I advise all to avoid this method whenever possible.

Cook a bunch more and your tray will look like this:

Don't even bother artistically arranging them on a nice plate.  Just get some soy sauce and chomp them down as quickly as possible.  BEWARE.  They stay VERY hot for several minutes after frying so remember which ones you fried first so you can start by eating those.  This will guarantee the optimum egg roll trance experience.

Lastly, these are good reheated . . . but they're not great.  Maybe reheated in a toaster oven wouldn't be bad . . .  This time we rolled them all up, but only fried about half and froze the rest.  Hopefully they'll fry up fine later and be as tasty as the fresh ones.

Miyagi's Meal:Lime and Cilantro Flank Steak

I originally had dinner plans on Friday, but when they fell through I said to Miyagi "pick ANYTHING you want for dinner and I'll make it!"  He interpreted this as "I get to make anything I want!"  Fine by me.  So he pulled out an old favorite that his dad makes on the grill.  Unfortunately for us we have no grill.  Not even one of those mini charcoal ones.  But what we DID have is this amazing thing called a broiler pan!  Did you know these existed?  I didn't!  And ours came with our oven!  In fact.  The first night we stayed at our apartment together we had just gotten home from our honey moon and had no dishes AT ALL.  So we made nachos in the bottom of the broiler pan.  It was clean. . . .


See the way the pan is conveniently vented on the top to create a similar grilling experience?  And then the pan underneath catches all the drippings which prevents your oven from coughing smoke every time you open the door.  Which is nice.

Anyway. Miyagi went to our local butcher and bought the smallest flank steak they had, which was 2 pounds, then drenched it in lime juice and cilantro and let it marinate for a couple of hours.  (I say our local butcher . . . I've never been there but I imagine that it was like meatopia for Miyagi and might have been the whole incentive around making this meal.  Again.  Fine by me.)


Then, while this is marinating it's important to make sure to clear the kitchen of any pesky bugs flying around.  You can probably see the tiny bug . . . but can you spot the wet hand print?  This just adds to the manly, brutish feeling of grilling (broiling) up a big hunk of meat.  Beware all flying creatures!  When Miyagi is in the kitchen . . . nothing survives.

So here we have the steak all slathered in limey/cilantroy goodness.  And next to it we grilled up some sliced sweet potato, also enjoying the lime/cilantro bath.  These cooked a bit quicker than the steak but all in all they turned out quite good.  I'm still undecided as to where I stand on the sweet potato issue.  I only started eating regular potatoes a couple of years ago.  I hesitantly tried a few bites and was pleased by the line flavor, however after a few more bites I decided that we had learned enough about each other on this date and I focused all my attention on the steak.

Miyagi was a little disappointed that the steak didn't turn out as well done as it does on an actual grill, but I yummed it right up with no hesitation.  It was a little lime-heavy at first, but after the initial pucker the zing was a nice compliment to meat.  Miyagi even managed to slice it oh-so-thinly for a very professional presentation.  The fact that he used a bread knife to do so only enhances the achievement.

In celebration we ate huge ice cream cones from Theno's Dairy.  Here is Miyagi eating his in a sly manor as he tries to stay invisible to his high school classmates in the background, who he he doesn't want to have to talk to.

Carbonara or Cardiovascular Disease in a Bowl

This was one of those magical meals that happens only when you THINK that you have nothing left in your house to eat.  But oh contrare m'friend!  You probably have all these ingredients in your house at this very moment!  It's so tasty and perfect for throwing in whatever else you have hanging around (tomatoes, artichokes, broccoli) but for all that it IS it's certainly NOT light.  But who cares about that anyway?

Start by chopping up about 1/2lb of bacon, yes bacon, into small chunks and fry them up.  This works best in a stainless steel pan (which I happen to own!) but it would work fine in a non-stick pan.

While this is cooking have your husband chop up half an onion and two cloves of garlic.  Then console him after a piece of onion flies RIGHT in his eye, and let him work it out by killing zombies on his computer.

Once the bacon's just barely done, we're not going for too crispy here, scoop it out with a slotted spoon and KEEP THE BACON GREASE hot in the pan.  Remember what I said about not light?

Dump the onions in the bacon grease and let them cook for 2-3 minutes, then add in the garlic.  You want to avoid adding the garlic at the beginning because otherwise it will burn and turn into nasty little pieces of black coal.  And nobody wants that.

Oh yeah.  You should be cooking some spaghetti while you're doing all this too.  Enough for two people.  However much that might be in your case.

And another thing?  In a big bowl (big enough to hold all the pasta when cooked) add two eggs,  3/4c Parmesan (or shaky cheese as it is sometimes known), and 1/2 a bunch of chopped parsley (I used a couple spoonfuls of dried).  Mix this together and set it aside.  I said don't touch it!  Don't think I'm not watching you.

After the onions and garlic have cooked through a bit spoon them out of the bacon grease and, finally, say sayonara to the rest of the grease.  Here's the exciting part!  We get to deglaze the pan!  Now you see why a stainless steel pan is so great!  I wasn't particularly interested in using the wine that's normally suggested so I used about 1/2 C of chicken stock.  Here's what you do.

Set the empty pan on a burner on high.  You want all the black crumbly bits at the bottom to heat up, just until the pan starts smoking.  Then in a flourish dump in the stock and pull your face away from the funnel of steam that issues forth.  Use a whisk or spoon to scrape off all those black crumbly bits from the bottom of the pan and TA DAAA. Consider yourself deglazed.

 Then you can add another 1/2C of chicken stock and be saddened that no column of steam accompanies it, then add back in the bacon, onion and garlic and let it simmer over medium heat.

Now we're almost done, I promise.  When your pasta is done drain it, then quickly add it to the bowl of eggs and such that you set aside earlier, and pour the onion/bacon mixture over top.  Make sure the pasta is HOT when you add it because that heat is going to cook the eggs and prevent unwanted things like salmonella and gross tasting carbonara.  (the two go hand in hand)  Finally, throw 2TB of butter in there (I know, I'm sorry) and some black pepper, and toss it all together.  If you're like me this means slopping half the pasta over the sides and getting lots of onions stuck in the recesses of your kitchen tongs. 


After the mess you can dish it right up and add some more Parmesan if you don't think there's enough to give you a heart attack.

I kind of wish I had had fresh parsley and some decent Parmesan, but whatever.  This was REALLY good and it heats up quite nicely for leftovers the next day.  Please to enjoy!

Stove Top Mac & Cheese

I love the idea of homemade macaroni and cheese but every time I have the baked stuff I feel like I've died a little inside.  I can't believe that it's so impossible to make a tasty home version of that delicious boxed stuff. Seriously, fake cheese is sometimes the highlight of my day.


So I found this recipe by Alton Brown, who is pretty much amazing, and decided to give it a whirl . . . but with mostly different ingredients. Because that's how I do things.

To start, boil and salt a big pot of water and throw in a couple servings of pasta. As you can tell this is very technical and all measurements must be to EXACT specifications.  I used rotini because it was easier to reach than the macaroni.  What.  Don't think I don't see the irony!

After it's cooked to that perfect al dente state, drain it and put it back in a pot with about 2Tbs of butter and stir it around until it's melted.  So far this feels just like the stuff in the blue box . . . which feels goooood.  (Who decided the box should be blue anyway?  Did Kraft just start the craze and everyone else is living off their success?  These are the kinds of questions I'd like answered.)

In a separate bowl whip together an egg and about 1/2 cup of evaporated milk, then pour over the pasta and stir in 1/2-1 cup of shredded cheese.  I used some aged white cheddar we had (aren't we sophisticated?)  but I almost think this would be better with that classic cheddar taste.

Keep stirring until all the cheese is melted and creamy.  You might need to put it back on some heat, or add some regular milk if it gets too thick.  In all honesty mine turned out a bit rich so I'd almost lean towards using regular milk anyway.

Add some salt and pepper and you're done! Please, don't skip this step.  I used to think that step was superfluous in most recipes and I'd just roll my eyes and say "oh SURE.  If the recipe was really that good I wouldn't NEED salt and pepper."  WRONG.  This is the difference between bland, inside-killing Mac & Cheese and glorious, tasty, lick-your-bowl-clean Mac & Cheese.

This really takes about the same amount of time as Mac & Cheese from a box, but people will think you're something amazing when you make it yourself.

Pulled Pork Quesadilla Things


I found a recipe online for some tasty looking quesadillas, but seeing as I had almost none of the exact ingredients I kind of threw this one together with what we had in the pantry.  Most of all, I just wanted to use some pulled pork that we had in the freezer and this seemed like as good of an option as any.

I'll take this step by step, but please . . . forgive my shoddy camera work?  I'm new at this.

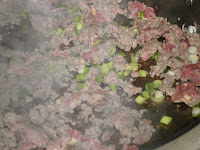
So I started by heating up our pulled pork in a skillet with some fajita/taco seasonings and a little water.


And here is where, in my haste to snap a picture, I knocked over the container of seasonings all over our kitchen chair.   There was a big cascading arc of Mexican spices, then the slow dawn of understanding.  A well seasoned chair is a wonderful thing.


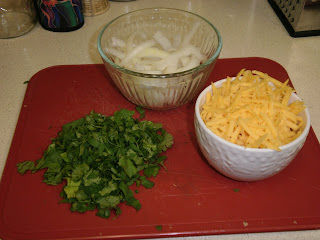
Next I set Miyagi to the chopping. (Don't tell anyone or else: chop chop!)  Ingredients are as follows:
  • about half a sweet onion, thinly sliced then sauteed with a little oil
  • a cup of cheddar (although this would be extremely tasty with some Monterrey jack!)
  • and a generous handful of fresh cilantro; that's the greenish stuff you see piled together


I let the meat simmering with a lid on to let the flavor sink in a bit, then started frying up some corn tortillas.  I've never quite mastered this art, but I read somewhere that you could cook them with just a few drops of olive oil . . . mine took a bit more than a few drops but these did turn out much less greasy this way.  I put maybe a teaspoon of olive oil in a hot skillet, then dropped the tortilla in and quickly spun it around and flipped it over so that I had an even amount of oil on each side.  Then I let them cook up for about 4 minutes a side.  Just so that they were beginning to get crispy and brown.


They were just right when you could hold them horizontally and they wouldn't completely flop over.  After these were mostly ready I took a couple and put them on ANOTHER hot skillet, this time smothered in cheese.  Smothered in cheese is always the better option.


The rest is just assembly.  Throw on another tortilla and layer with meat, onions and cilantro.


Then when the cheese is all melty and screaming EAT ME! smash the two sides together and top with whatever suits you.  I personally prefer huge heaping mounds of sour cream.  But salsa is prettier.  So Miyagi got these and I slathered mine behind the camera.

These were super tasty and even more thrilling I didn't have to go to the store for anything!  The pork was great but in the future I'd probably rather just use chicken.  Even the shredded stuff in the can might be good with a little coaxing.

For those that are curious, we followed up our meal with a dainty desert of Red Vines.  Like a fine wine, every meal has it's desert.

Site Meter